Like everything, the more you do something the better you get at it.
Designing and renovating is no different. We have been renovating homes (for profit) for the last 10 years across multiple different countries. We have made a lot of mistakes and we have learnt a lot of lessons with all of the houses we have redesigned and renovated.
We have taken that learning and have put it to good use as we now focus on renovating our own home, I won’t say ‘forever’ home as that’s not how we roll but I will say it’s our ‘for right now home.’
Part of our renovating includes raising our 100 year old house and building underneath and adding a side of extension and we intend to DIY as much of it ourselves. Not only does it mean building new rooms but we will also be renovating every room in the house.
We will be going from a 2 bedroom, 1 bathroom home to a 7 bedroom 3.5 bathroom home.
I will be sharing each room as we progress and my focus for this blog is the Laundry.
This will be one of my fav rooms in the house!
As not everyone has had the opportunity to renovate as many houses as we have I thought I would share our 3 step process to designing our laundry.
Step One: How Will the Room be Used?
This is where we start when designing any room you need to figure out HOW you want to use the room.
For me, I have 3 kids, 3 dogs and a muddy husband so here’s my wish list.
- Mudroom
- Storage for school bags and shoes
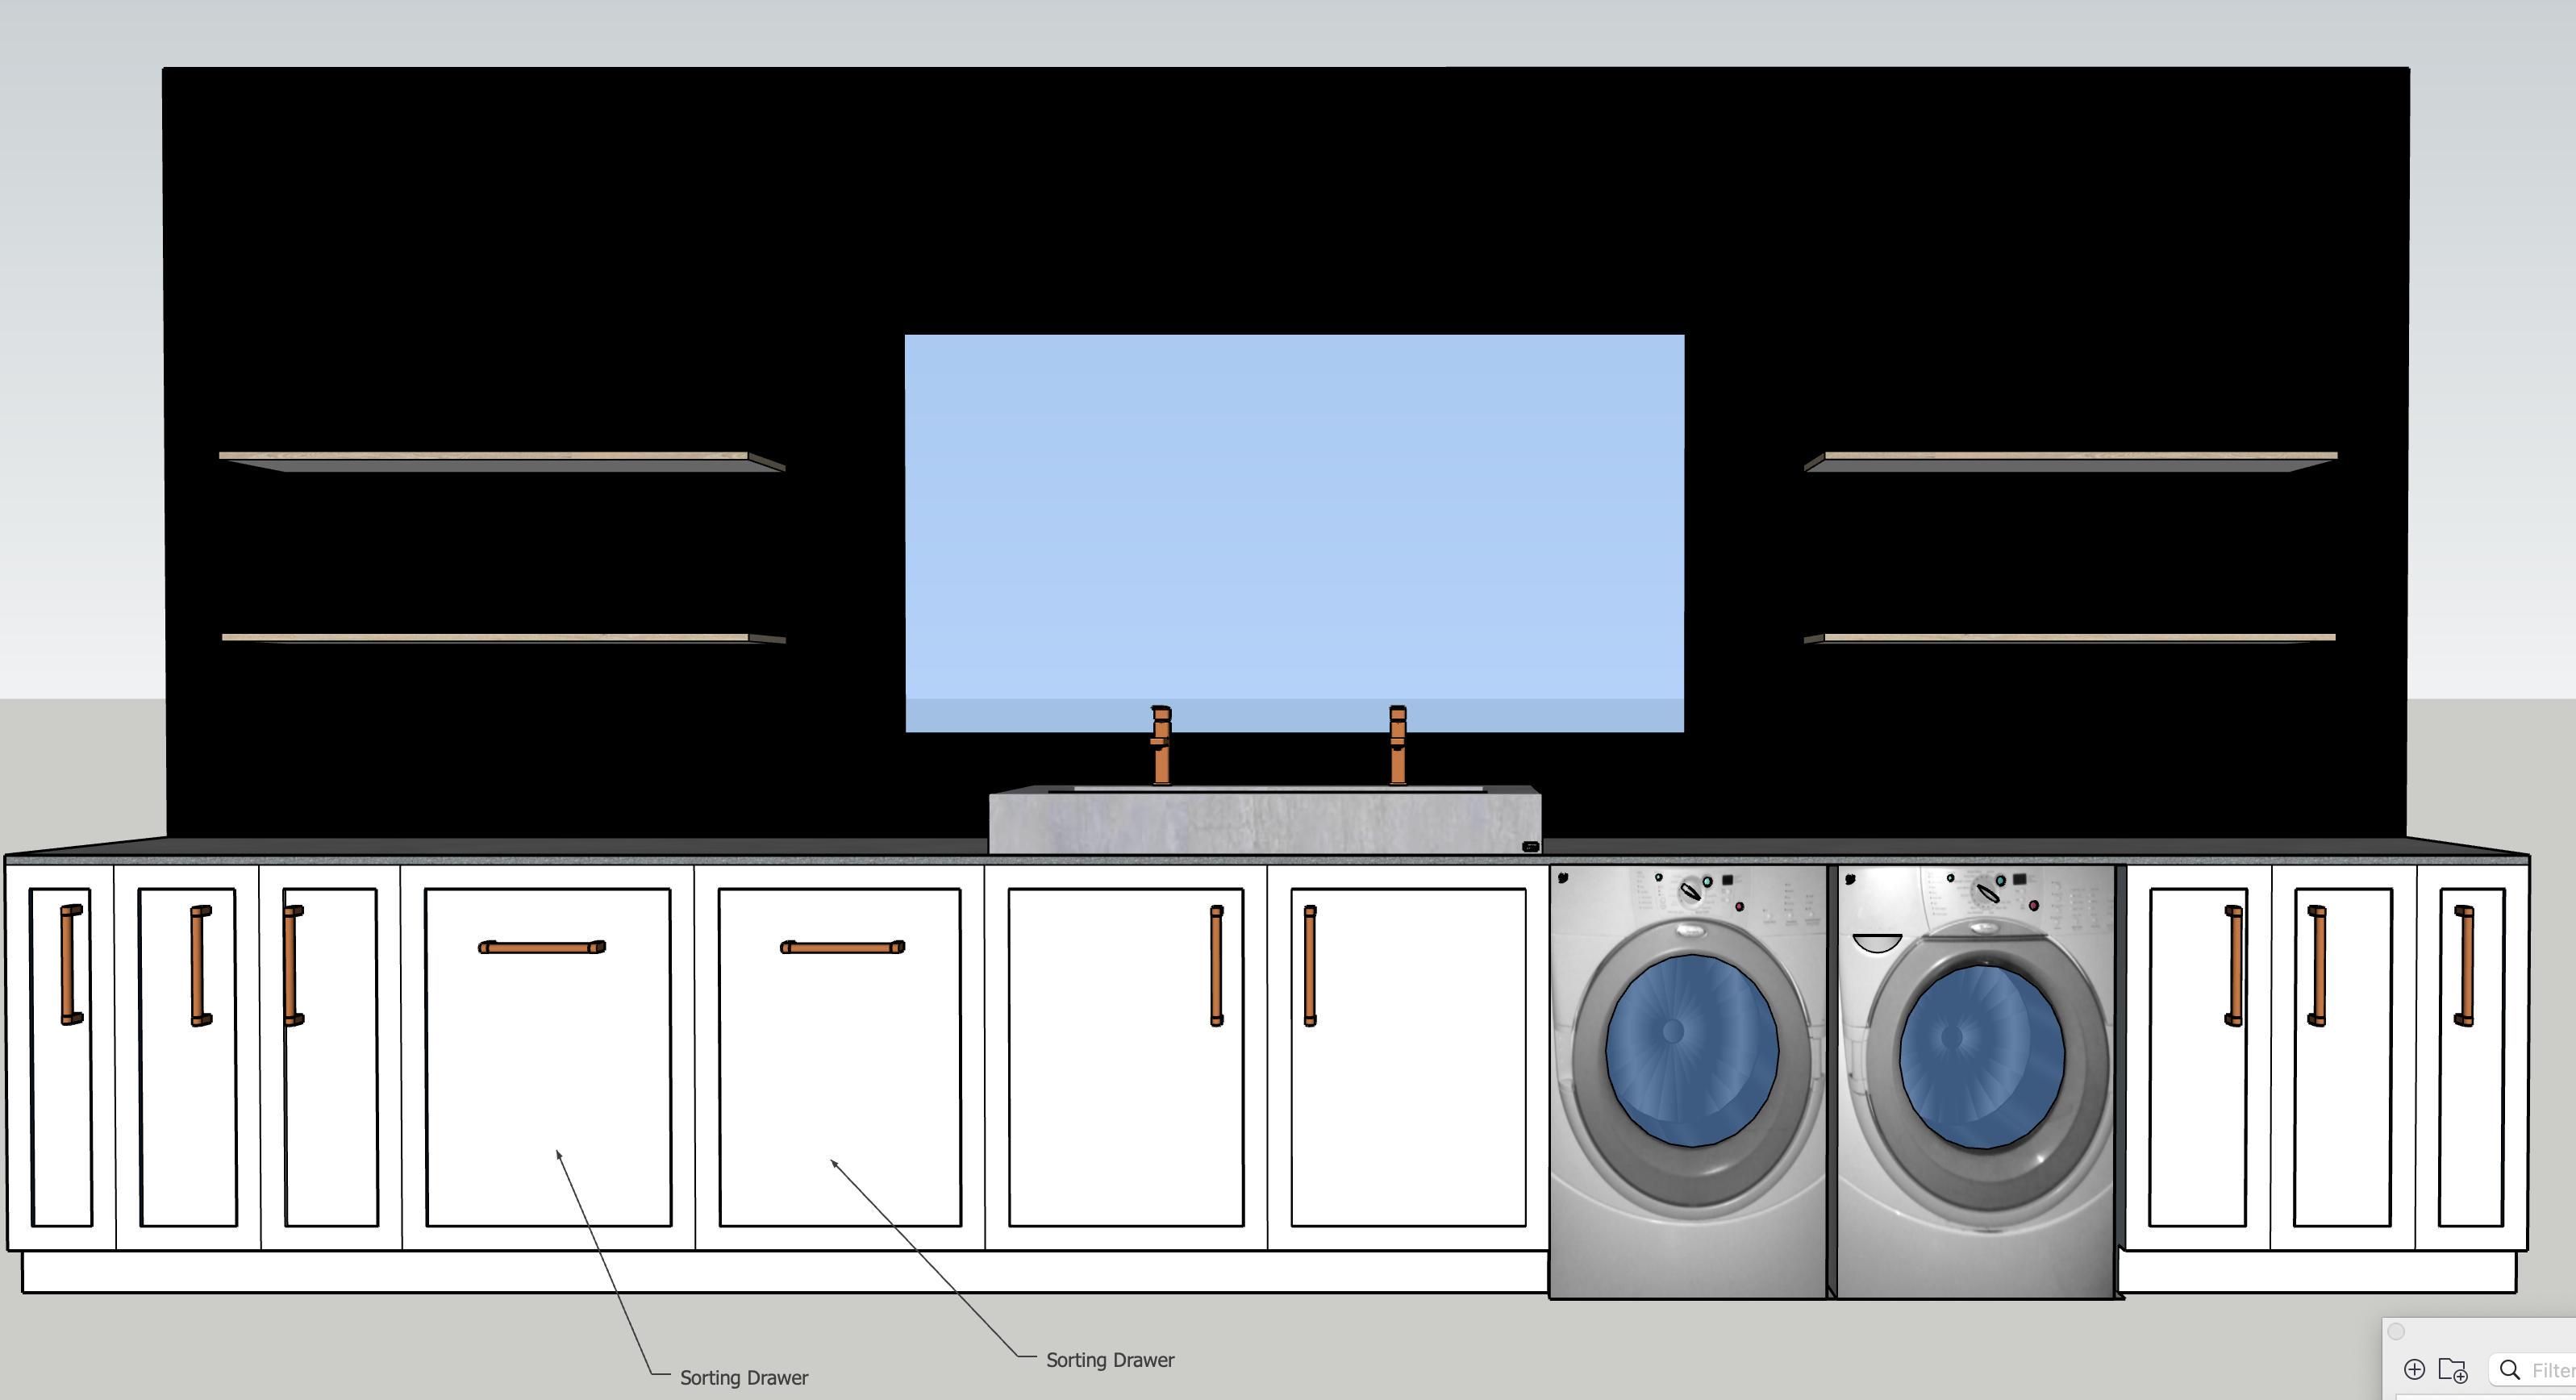
- Functional laundry with sorting bins
- Storage for laundry items and cleaners
- Hanging space
- Ironing station
- Storage cupboard for shoes and house hold cleaning products
OK so that’s a lot but we do have quite a large space so I want to make sure we utilise every inch of it.

Step Two: Start playing around with the design.
I use Sketchup Pro to design for myself and my clients, it’s a great program but there is a cost and a learning curve. For those interested I started using Sketchup Pro on their 30 day trial and I purchased a Sketchup Pro Training program through The Little Design Corner
This course was very practical and I went from not being able to design a square to drawing 3D models of a house and detailed room design. If you’re doing your own home and you’re committed you can get the design done within the 30days and not pay for a continued license with Sketchup Pro.
But if you don’t want to do that then you can always email me to discuss how I can help you with your room design.
You don’t have to use Sketchup pro or any other program for that matter, you can just draw it out on a piece of paper and go from there.
This is my process.
- Start with a piece of paper and draw the room (very badly as I can’t draw very well) and I play around with the layout.
- Once I feel like I have a rough idea of the room and layout I then create it in Sketchup Pro and create the floorplan to scale. This then enables me to determine what items in my wish list are able to fit in the space.
- Once I’m happy with the design I will then create the 3D model so I can see it before I finalise the final design.


Step Three: Create a Design Concept
Here’s my process…
- I head on over to Pinterest (feel free to follow along) And I gather some inspiration to get an idea of the types of finishes and overall design I’d like to achieve. I don’t create mood boards, it’s not really my thing I actually prefer to visualise it in my head and go straight to the concept. But I know a lot of people LOVE to do mood boards and they are a fabulous way to organise your thoughts and get your overall design mood ready for the next step.
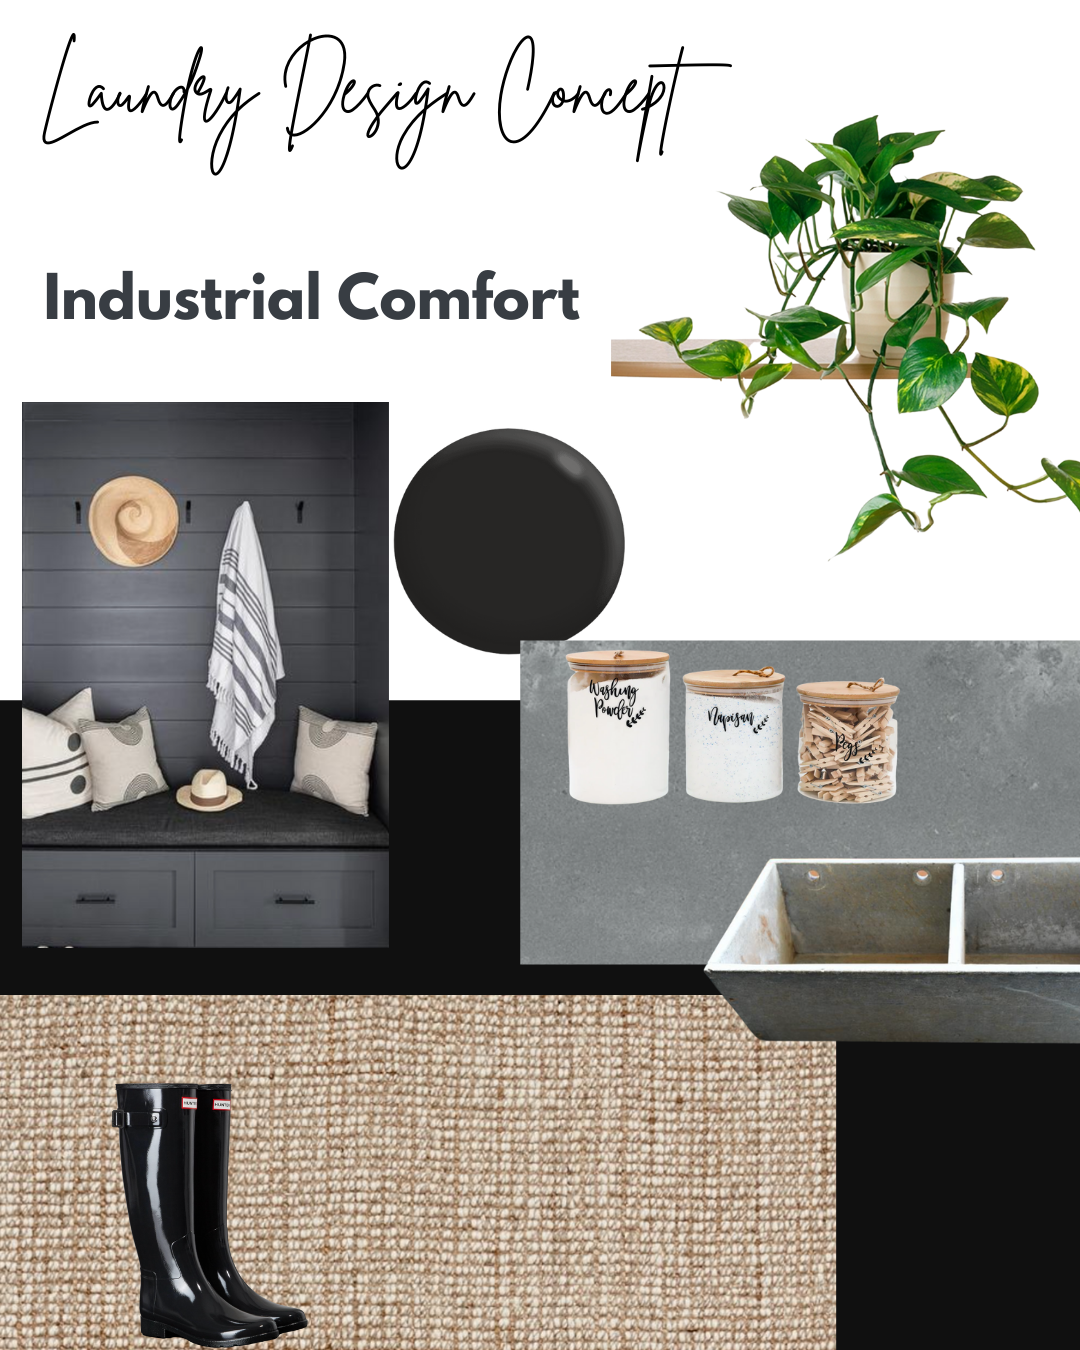
- Once I have a design I start to search for finishing products and head over to Canva and drop these into a design concept. This will help me to determine if the overall design is cohesive and to ensure all of the finishes work well together. (see below) – I will add a tutorial on this very soon.
- Now I start ordering! and get renovating.

And finally the key to any renovation is to be organised and to set yourself a plan and a budget. You can either create this yourself or if you’d rather one done for you then download the ‘Fixer Upper Budget Tracker’ which includes a very detailed list of materials and a renovation plan template that you can use to keep your renovation on track and on budget. so you can get started today.
